


Learn how to make delicious sushi rice with this easy to follow tutorial, and impress your guests at the next sushi party!
Sushi rice is the foundation of every great roll, chirashi bowl, or nigiri. It's not just steamed rice—it's seasoned, balanced, and handled a very specific way to get that slightly sticky, glossy texture with a gentle sweet and tangy flavor. The good news? Making perfect sushi rice at home is easier than you think once you know the right technique.
In this guide, I'll show you exactly how to make sushi rice step-by-step, plus the small details that make a big difference—so your sushi tastes like it came from a Japanese restaurant.
What is Sushi Rice?
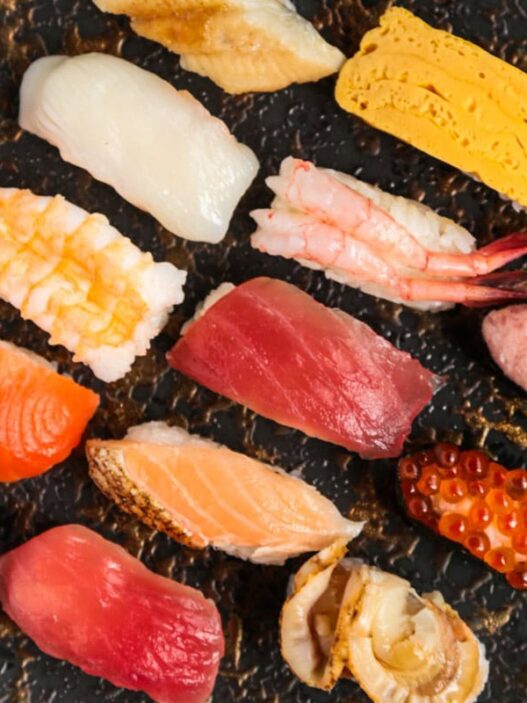
Sushi rice, or sushi meshi, is Japanese short-grain rice that's cooked and then seasoned with a mixture of rice vinegar, sugar, and salt. The rice is used for dishes such as nigiri sushi which is the classic sushi rice with fish on top, chirashi sushi (scattered sushi bowl), inari sushi (sushi rice stuffed in seasoned fried tofu pouches), and maki sushi (sushi rolls).
Ingredients for Sushi Rice
- Japanese short grain rice: Japanese short grain rice is the golden standard for sushi rice as it's stickier than other types of rice.
- Water: Plain tap water is okay. No need to use filtered water or anything fancy.
- Rice vinegar: Plain rice vinegar adds a little sweetness and an almost fruity element.
- Sugar: A little sugar to enhance the natural taste of the rice.
- Salt: A little salt to balance the sweetness.
The quality of the rice and vinegar makes a big difference here—simple ingredients, but each one matters.
What Kind of Rice to Use for Sushi Rice
For the best results, always use premium short-grain Japonica rice such as sasanishiki – not to be confused with Nishiki, which is a medium grain rice grown in California – which has the right balance of softness, lightness, and stickiness. Second best is koshihikari, also known for it's high quality grains, but a little stickier than sasanishiki.
Avoid long-grain or jasmine rice—they won't give you the texture needed for sushi.
How to Make Sushi Rice
Tools needed
- Rinse the rice. Place the rice in a bowl and rinse it under cold water, gently swishing it around with your fingers. Drain and repeat until the water runs mostly clear. This step is essential—skipping it is one of the main reasons sushi rice turns out gummy instead of light and slightly sticky.
- Soak the rice. This is an important step that helps the grains absorb moisture and cook evenly. If you are cooking Japanese rice in a pot, soak the rice for about 30 minutes before cooking it. If you are using a rice cooker, soaking is pre-programmed in the cooking process so you just have to place the rice in the inner pot, close the lid, and press start.
- Cook the rice. Cook the rice using your preferred method (rice cooker or stovetop), following the correct water ratio for short-grain rice. Once cooked, let it sit covered for about 10 minutes before handling.
- Prepare the seasoning. In a small bowl, mix rice vinegar, sugar, salt, and kombu dashi (if using), until dissolved.
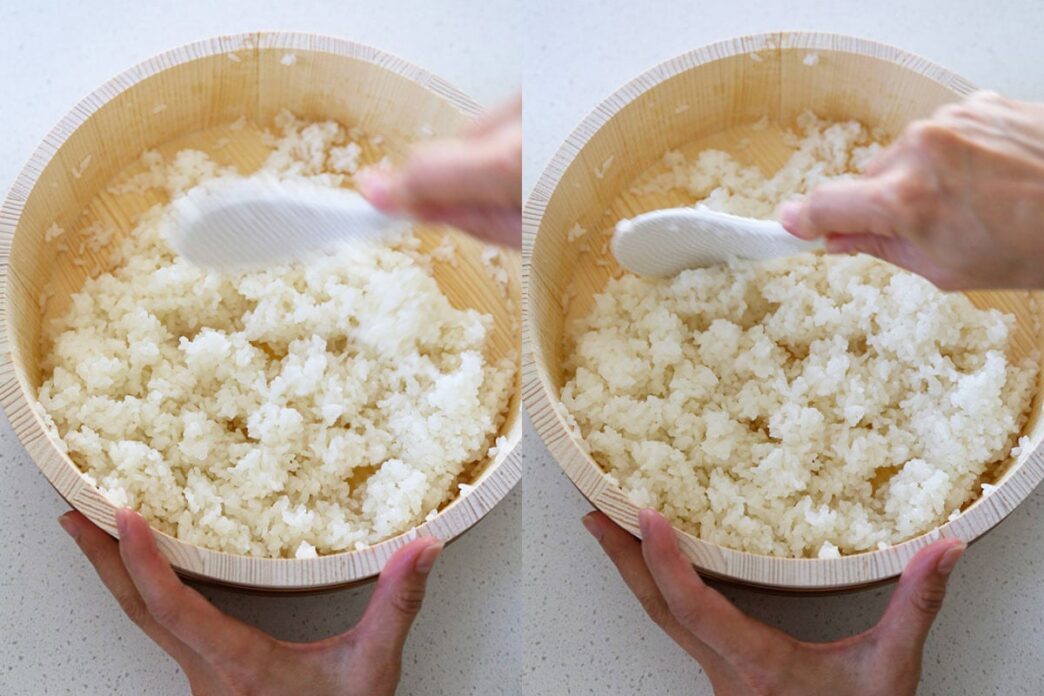
- Season the rice. Transfer the rice to a sushi oke (wooden tub) or wide bowl. While it's still warm, gently fold in the seasoning. In Japan, sushi rice isn't stirred like regular rice—it's folded using a slicing motion to avoid crushing the grains. At the same time, it's often fanned to cool it quickly, which helps give it that signature glossy finish you see in restaurants.
- Let it cool. Allow the rice to cool to room temperature before using.
Using a rice washing bowl
Another way to wash rice is to do it with a rice washing bowl like the one I'm using in the pictures. The concept is the same except that you don't have to constantly fill and drain the bowl. The rice washing bowl is great because it has tiny holes at the bottom of it and automatically drains the water as you polish the rice.
Why Your Sushi Rice Isn't Turning Out Right
If your sushi rice doesn't look or taste quite right, here are the most common issues and how to fix them:
- Rice is too mushy. Too much water or not rinsing enough starch before cooking.
- Rice is too dry or hard. Not enough water or undercooking.
- Rice isn't sticky. Using the wrong type of rice (short-grain is essential).
- Rice tastes bland. Not enough seasoning or uneven mixing.
- Rice is too wet after seasoning. Mixing too aggressively or adding the vinegar while the rice is too hot.
Tips for Perfect Sushi Rice
- Use short-grain rice only
- Don't skip rinsing
- Season while the rice is warm
- Fold gently instead of stirring
What to Make with Sushi Rice
Sushi rice is incredibly versatile and can be used in a variety of dishes:
Once you have the rice right, everything else becomes much easier. If you like your sushi with a side salad, check out this classic Japanese dressings guide. To complete your meal, serve your sushi dinner with a miso soup and some edamame.
Did you like this tutorial? Are there changes you made that you would like to share? Share your tips and recommendations in the comments section below!
Print
How to Make Sushi Rice
Learn how to make delicious sushi rice with this easy tutorial.
- Prep Time: 10 minutes
- Cook Time: 25 minutes
- Total Time: 35 minutes
- Yield: 4 cups 1x
- Category: Rice
- Method: Rice cooker
- Cuisine: Japanese
- Diet: Gluten Free
- Put the rice in a rice washing bowl and run cold water over it. Rinse the rice using your hand, in a swirling motion. Keep doing this until the water runs clear, and drain well. If you don't have a rice washing bowl, put the rice in a medium size bowl and pour a little water in it. Wash the rice in a swirling motion to remove the excess starch and pour as much of the water out (don't use the strainer yet). Repeat this step until the water runs clear and strain the rice through a sieve to drain all the water.
- Transfer the rice to a rice cooker and add just enough water that it's just under the 2 cup line. Close the lid and press start. If you are cooking Japanese rice on the stove, please follow the instructions from the post how to make Japanese rice.
- Mix all the ingredients for the sushi rice seasoning. Keep stirring until the sugar has dissolved and set aside.
- Fill a cup with tepid water and place your rice paddle in it. This is to prevent the rice from sticking to the rice paddle.
- Wet the sushi oke (wooden tub) or a glass or plastic bowl with a little water or rice vinegar. This is to prevent the rice from sticking to the surface. Add the rice.
- Spread the rice with the rice paddle and pour the vinegar mixture over it. Gently fold and slice the rice a few times until the vinegar mixture is evenly distributed and the rice is warm but cool enough to handle. Do not over mix as this will make the rice mushy! Just a few times is enough.
- Cover with a kitchen towel. This prevents the rice from drying as it's being used. Use within an hour.
Notes
How to store sushi rice: Let the sushi rice cool down to room temperature and transfer it to an airtight storage container. Refrigerate for up to 3-4 days.
Nutrition
- Serving Size: 1/2 cup
- Calories: 145
- Sugar: 6.3g
- Sodium: 581.4mg
- Fat: 0.2g
- Saturated Fat: 0.1g
- Unsaturated Fat: 0.1g
- Trans Fat: 0g
- Carbohydrates: 32.9g
- Fiber: 0g
- Protein: 2.2g
- Cholesterol: 0mg
Frequently Asked Questions
Every rice cooker comes with its own measuring cup. While a standard US cup equals 240ml, a rice cooker cup equals 180ml. That's because the rice cooker cup is based on the daily serving of a rice typically consumed by a Japanese adult. So when you make rice in a rice cooker it's imperative that you use the cup it came with otherwise the measurement of water to rice will be off.
It's not recommended. Stick with Japanese short-grain rice if you can. Jasmine rice, basmati, or other long-grain varieties won't have the right stickiness or texture for sushi. If you absolutely need a substitute, medium-grain rice can work in a pinch, but the result won't be quite the same.
It's best fresh, but you can keep it at room temperature for a few hours covered.